

Last Updated: November 9, 2026
If you own an older or historic home in Greater Boston, wall insulation may come up because you want to improve comfort and energy performance, or because a larger renovation is already creating access to the walls. In either situation, the first question is whether adding insulation to those walls makes sense for the building.
Historic walls were built with materials and assemblies that can behave very differently from modern construction. Adding insulation can change how the wall manages heat, air, and moisture, and it may affect original plaster, siding, masonry, trim, existing wiring, or other concealed conditions.
This guide will help you understand when wall insulation may be appropriate, what should be evaluated before work begins, and how the options differ for wood-frame and masonry walls so you can make a more informed decision with your renovation team.
Start With the Building, Not the Insulation Product
Before an insulation system is selected, the first question is whether adding insulation to the walls is appropriate for your building at all.
The National Park Service recommends an energy audit before weatherization work and generally prioritizes lower-impact measures such as reducing air leakage and insulating attics, basements, or crawlspaces before more invasive wall work. Wall insulation may still be the right choice, but that decision should follow an assessment of the building rather than start with a particular insulation product.
As the homeowner, your role is to explain to the project team what you are trying to improve—such as comfort, drafts, energy performance, or conditions related to a larger renovation—and share any known history of leaks, moisture, previous alterations, or other concerns.
The project team should then establish:
- What the wall is made of. Wood-frame walls, solid masonry, brick veneer over framing, and other assemblies manage heat and moisture differently.
- Whether a usable cavity exists. Framing depth, sheathing, blocking, fire stops, previous alterations, and concealed wiring can affect whether cavity insulation is practical.
- Whether water is already getting in. Roof leaks, failed flashing, deteriorated masonry joints, siding defects, drainage problems, and plumbing leaks should be identified and addressed before insulation is installed.
- What historic materials may be affected. Plaster, wood paneling, trim, siding, masonry, windows, and other character-defining features can influence how the wall is accessed and which retrofit approaches are reasonable.
- Whether other improvements should come first. Air sealing, attic insulation, basement or crawlspace work, or mechanical-system improvements may address part of the problem with less disturbance to historic walls.
A qualified energy or building-performance professional may use tools such as blower-door testing and infrared thermography to identify air leakage, missing insulation, or thermal irregularities. Those findings should inform the project team’s evaluation; they are not a substitute for understanding the wall assembly itself.
Once those conditions are understood, the project team can recommend an insulation approach and explain the trade-offs. Your role is then to understand what is being proposed, why it is appropriate for your building, what existing materials will be affected, and how the work fits into the larger renovation plan before you approve the scope.
Wood-Frame Historic Walls: When Cavity Insulation May Be Appropriate
In many older wood-frame homes, there is an open space between the interior wall finish and the exterior sheathing or siding. If that space is suitable, insulation may be added without completely removing the wall finishes.
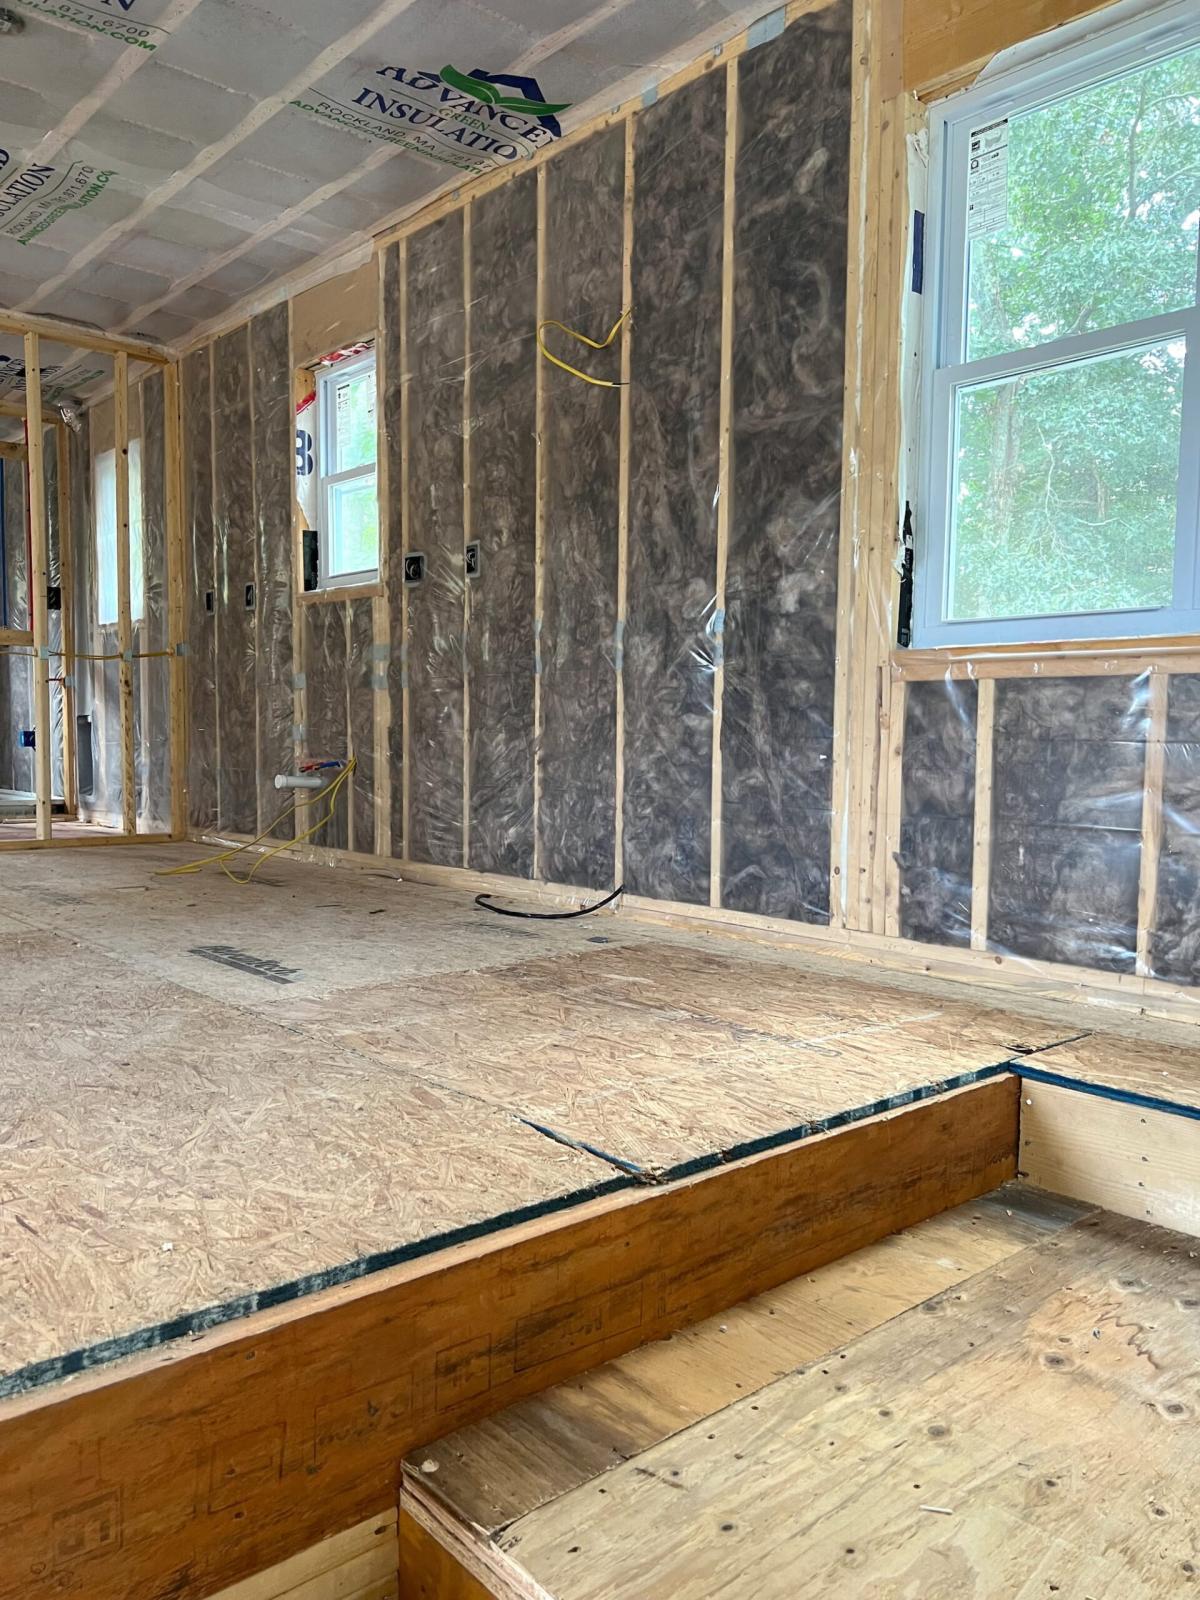
One common approach is to make small access openings and blow insulation into the spaces between the wall studs. This is often called blown-in or drill-and-fill insulation, and materials such as cellulose or fiberglass may be used depending on the wall and the proposed assembly.
The important decision for you as the homeowner is not which material to choose. The project team should first determine whether the existing wall is actually a good candidate for this approach.
The National Park Service’s guidance on historic wood-frame walls notes that adding insulation is generally more straightforward when sheathing exists between the wall framing and exterior siding. When that protective layer is missing, exterior moisture can more easily reach material placed inside the wall, making the retrofit more complicated.
Before recommending insulation inside an existing wood-frame wall, the project team should evaluate:
- What is actually inside the wall. Blocking, old repairs, wiring, plumbing, or other concealed conditions can interrupt the spaces that would otherwise be filled with insulation.
- Whether the wall has a moisture problem. Leaks or deterioration should be corrected before insulation is installed.
- How the insulation would be installed. Accessing the wall from the interior or exterior can affect original plaster, siding, trim, and other finishes.
- Whether electrical conditions need attention first. Older or active knob-and-tube wiring, for example, should be evaluated before insulation is placed around it.
- How air leakage will be addressed. Adding insulation inside the wall can reduce some air movement, but it does not automatically seal every opening where outside air can enter the building.
If the walls are already being opened as part of a larger renovation, the project team can directly inspect framing, sheathing, wiring, moisture conditions, and other concealed conditions before insulation is installed. If the existing finishes are staying in place, there is less visibility into the wall, so the investigation before choosing an installation method becomes even more important.
As the homeowner, you do not need to determine the insulation material or installation technique yourself. You should be able to understand why the proposed approach is appropriate for your wall, what conditions were evaluated, what existing materials will be disturbed, and what uncertainties will remain concealed after the work is complete.
Historic Masonry Walls Need a Different Approach
Historic brick and stone walls are different from the wood-frame walls. In many older masonry buildings, the brick or stone itself forms most or all of the exterior wall. There may not be an open framed space where insulation can simply be added.
That difference matters because masonry can absorb rainwater and release moisture as conditions change. Adding insulation—particularly on the interior side—changes the temperature of the masonry and can change how quickly it is able to dry.
The National Park Service warns that interior insulation can reduce inward drying and keep exterior masonry colder. In a cold climate, that can increase the risk of moisture remaining in the wall and, with some types of masonry, damage from repeated freezing and thawing.
This means the project team needs to understand the existing wall before recommending an approach.
The project team may need to evaluate:
- What the wall is made of. Brick, stone, mortar, interior plaster, previous coatings, and later alterations can affect how the wall handles moisture.
- How exposed the wall is to rain. An exposed elevation can behave differently from a wall protected by neighboring buildings, roof overhangs, or other features.
- Whether water is already entering the wall. Problems with flashing, mortar joints, roofs, windows, or drainage should be addressed before insulation is considered.
- How the proposed insulation would change the wall. Interior insulation can make the exterior masonry colder and reduce its ability to dry toward the inside.
- Whether specialized analysis is needed. For some assemblies, a building-envelope professional with experience in historic masonry may be appropriate before the insulation system is finalized.
As the homeowner, you should not be expected to determine how the masonry will dry or select the technical wall assembly yourself. Your role is to understand what the project team found, why insulation is or is not being recommended, what risks and trade-offs have been identified, and how the proposed work fits into the goals of your larger renovation.
The key difference is that historic masonry insulation is not simply a matter of filling available space. It is a change to the way the entire wall manages heat and moisture, which is why the existing conditions need to drive the solution.
Moisture Problems Come Before Insulation
If a wall already has a moisture problem, adding insulation can make that problem harder to detect and, in some cases, more difficult for the wall to dry. That is why existing water and moisture conditions should be understood before insulation is installed.
As the homeowner, you are not expected to diagnose where the moisture is coming from. Your role is to tell the project team about anything you have noticed, such as:
- damp or stained plaster;
- peeling or bubbling paint;
- musty odors, especially after rain;
- white deposits, crumbling surfaces, or persistent dampness on masonry;
- known roof, gutter, window, plumbing, or drainage problems; and
- previous leaks or water damage, even if the area now appears dry.
The project team should then determine whether those symptoms point to an active problem and identify the likely source before recommending insulation. That may involve evaluating the roof, flashing, siding, masonry joints, windows, plumbing, grading, interior humidity, or other conditions affecting the wall.
The project team needs to understand how water could enter the wall, how moisture currently leaves it, and how the proposed insulation would change that behavior.
Historic-building guidance does not support one universal moisture-control approach for every old wall. The National Park Service notes that there are no reliable prescriptive measures that prevent moisture problems in every historic wall assembly. The right approach depends on the wall materials, climate, exposure to rain, existing construction, and the insulation system being considered.
That means decisions about membranes, coatings, air sealing, or other moisture-control layers should be made by the project team based on the actual wall.
Before approving the insulation scope, you should be able to understand:
- whether an existing moisture problem was found;
- what is causing it and what needs to be corrected first;
- how the proposed insulation will affect the wall’s ability to dry;
- whether any additional moisture-control work is part of the scope; and
- what conditions will remain concealed after the wall is closed.
The goal is for the project team to explain the wall clearly enough that you can understand why the proposed approach is appropriate before the work moves forward.
Interior and Exterior Insulation Have Different Trade-Offs
Once the project team determines that wall insulation is appropriate, the next question is how the work can be incorporated into the building. The two broad approaches are adding insulation from the interior or from the exterior, and each affects the property differently.
The project team should evaluate the wall assembly, moisture conditions, existing finishes, preservation requirements, and the rest of the renovation scope, then explain the trade-offs before a direction is selected.
Interior approaches
Adding insulation from the interior can preserve the exterior appearance of the building, but it may require disturbing plaster, trim, or other interior finishes.
For wood-frame walls, the project team should determine whether the existing wall can be insulated without creating moisture or access problems and how much of the interior finish will need to be opened or repaired.
For solid masonry walls, interior insulation requires additional care because it can make the masonry colder and change how the wall dries. The project team may need input from a building-envelope professional with experience in historic masonry before recommending this approach.
As the homeowner, you should understand:
- which interior finishes will need to be disturbed;
- what repairs or restoration will be required afterward;
- whether any existing conditions need to be corrected first; and
- why the proposed interior approach is appropriate for your particular wall.
Exterior approaches
Adding insulation from the exterior can improve thermal continuity because the insulation can cover more of the wall surface without being interrupted by framing. But on an older or historic property, that advantage has to be weighed against changes to the exterior.
For historic wood-frame buildings being treated under preservation standards, National Park Service guidance says exterior rigid foam is not an appropriate treatment when it requires removing historic siding and trim or changes the relationship of windows, walls, eaves, and other character-defining features.
Even when preservation standards do not prohibit the approach, the project team still needs to evaluate how added exterior thickness will affect siding, windows and doors, flashing, roof edges, drainage, trim, and the overall appearance of the building.
As the homeowner, your role is to understand what the exterior approach would change:
- whether original siding or trim would be removed or altered;
- how windows, doors, and architectural details would be affected;
- whether historic review or other approvals are required;
- what additional exterior work becomes part of the scope; and
- why the project team recommends the exterior approach over an interior alternative.
The decision is therefore not simply “inside or outside.” The project team should recommend the approach that best fits the building and explain the consequences clearly enough for you to decide whether those trade-offs align with your renovation goals.
Historic Review and Lead-Safe Requirements
These can affect how insulation work is designed and performed. As the homeowner, you can help by sharing any information you already have about the property, such as a historic designation, previous approvals, lead inspection reports, or records from earlier renovations. If you do not know whether any of those conditions apply, the project team should help identify what needs to be verified before the scope is finalized.
Historic review
If the proposed work will affect the exterior of an older property, the project team should determine whether the building is subject to historic-design review and how that may affect the proposed work.
In Boston, the Landmarks Commission reviews applicable exterior changes to designated landmarks and properties in local historic districts. Other Greater Boston municipalities have their own preservation rules and review processes. An older house is not automatically subject to historic review simply because of its age.
The project team should explain:
- whether the property has a designation that affects the proposed work;
- which exterior changes may require review;
- how those requirements could affect siding, trim, windows, exterior insulation, or other parts of the design; and
- who will be responsible for preparing and coordinating any required submissions under the project agreement.
Your role is to understand how those requirements may affect the design, scope, schedule, and appearance of the project before approving the direction.
Lead-safe renovation requirements
Painted surfaces also need to be considered before insulation work begins.
For covered renovation, repair, or painting work performed for a fee in pre-1978 housing, Massachusetts requires a licensed lead-safe renovation contractor when the work disturbs more than 6 square feet of painted surface per room inside or more than 20 square feet outside, subject to applicable exceptions. The state’s lead-safe renovation guidance for homeowners explains those requirements.
Insulation work can involve drilling through painted plaster, removing siding, opening walls, or disturbing painted trim, so the project team should identify whether the planned work may trigger lead-safe requirements and make sure the scope accounts for the appropriate contractor qualifications, containment, and work practices.
As the homeowner, you should understand:
- whether painted surfaces will be disturbed;
- whether lead-safe requirements apply to the proposed work;
- how those requirements affect the construction approach;
- whether additional containment or restoration work is included in the scope; and
- who is responsible for carrying out the required work under the project agreement.
The project team should identify the requirements that affect the work, explain their practical consequences, and make clear what needs to happen before construction proceeds.
A Practical Sequence for a Historic Wall Insulation Retrofit
A historic wall retrofit should follow a clear sequence, with the homeowner and project team responsible for different decisions.
- Define what you want to improve. As the homeowner, explain whether the concern is comfort, drafts, energy performance, condensation, or part of a larger renovation. Share any known history of leaks, moisture, electrical work, or previous alterations.
- Assess the building and wall conditions. The project team should determine whether wall insulation is appropriate, identify the wall construction, evaluate moisture conditions and concealed constraints, and consider whether other improvements should come first.
- Resolve existing problems. If leaks, deterioration, unsafe wiring, or other conditions are found, the project team should explain what needs to be corrected before insulation proceeds and how that affects the scope.
- Develop the insulation approach. The project team should recommend an interior, exterior, or cavity-based approach based on the wall assembly, moisture performance, preservation considerations, and the larger renovation plan.
- Review the trade-offs together. Before approving the scope, you should understand why the recommended approach was selected, what materials or finishes will be affected, what conditions will remain concealed, and what alternatives were considered.
- Address required reviews and safety measures. The project team should identify applicable historic-review, lead-safe, electrical, permitting, or other project requirements and clarify who is responsible for each step under the project agreement.
- Complete and document the work. The project team should execute the approved scope and document the materials and locations involved. As the homeowner, keep those records for future maintenance or renovation work.
The goal is for the project team to investigate the building, explain the recommended solution and its trade-offs, and give you enough information to make an informed decision before construction moves forward.
Planning a Historic Wall Retrofit in Greater Boston
Wall insulation often makes the most sense as one part of a larger renovation or building-performance plan, especially when walls are already being opened or exterior work is already planned. The insulation decision should follow the outcome you want, the conditions the building presents, and the constraints that have to be resolved—not become a separate product choice.
At Beantown Builders, that planning logic is reflected in our Right Plan Framework™. Assessment defines the owner’s objectives, feasibility, and constraints; Planning develops the solution and prepares the project for construction; and Execution manages construction. Our historic home renovation services and building-retrofit work bring those decisions into a coordinated renovation scope.
If you are planning a renovation in Greater Boston and need to understand how wall, moisture, preservation, and construction decisions fit together, Book a Free Discovery Call to discuss your goals, high-level scope, timing, and budget range and explore whether our approach aligns with your project.
Frequently Asked Questions
Can insulation be added to historic walls without removing all of the plaster?
Sometimes. In certain wood-frame walls, insulation can be installed through small access openings rather than removing the entire interior finish. Whether that approach is appropriate depends on what is inside the wall, whether moisture or wiring problems are present, and how much of the existing plaster, siding, or trim would need to be disturbed.
The project team should evaluate those conditions and recommend an installation method. As the homeowner, you should understand what areas will be opened, what finishes will need to be repaired, and what conditions will remain concealed after the work is complete.
Can adding insulation to historic walls cause moisture problems?
Yes. Adding insulation changes how heat and moisture move through a wall. In some assemblies, particularly historic masonry walls, an inappropriate insulation approach can make it harder for moisture to escape or keep exterior materials colder during winter.
The project team should evaluate existing moisture conditions and how the proposed insulation will affect the wall before recommending a solution. You should understand whether any moisture problems need to be corrected first and how the proposed approach is intended to manage those risks.
Should historic walls be insulated from the inside or the outside?
There is no universal answer. The appropriate approach depends on how the wall is built, its moisture conditions, the existing finishes, preservation requirements, and the larger renovation scope.
The project team should compare the available approaches and explain how each would affect the building. As the homeowner, your role is to understand the trade-offs—including changes to plaster, siding, trim, windows, architectural details, and the overall project scope—before approving the direction.
Do historic walls always need a vapor barrier when insulation is added?
No. Historic walls do not all manage moisture the same way, so there is no single moisture-control layer that should automatically be added to every wall.
The project team should determine whether any air- or moisture-control materials are appropriate based on the wall construction, climate, existing materials, and proposed insulation system. As the homeowner, you do not need to select those materials yourself, but you should understand how the proposed wall assembly is intended to manage moisture and why that approach is appropriate for your building.